Frequently Asked Questions
Web Application FAQs
Because our web application is hosted on the cloud, no installation is necessary. Customers can access their accounts from anywhere using a secure web login. However, certain functionality, such as handset tracking, requires the app to be downloaded onto mobile devices.
An unlimited amount of users can exist under each tier.
After your account is set up, log into https://login.wfmplatform.com/ using the username and password provided to you.
Verify that you’re using the correct login and password. If you have forgotten your password, select Forgot Password to reset it. If you still can’t access the application, contact your system administrator for assistance.
Yes! You can choose the vertical closest to your industry and customize it later to fit your business needs.
You can download it through the App Store for iOS devices or Google Play for Android devices.
Our application is compatible with Apple devices on iOS version 9 or higher and Android devices on version 7.0 or higher.
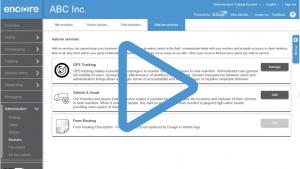
You can change your application’s appearance through Administration > Settings > Appearance. Feel free to add your company’s logo to the interface and incorporate brand-compliant colors into your application’s theme as well. For more information, view our tutorials HERE.
The account owner will need to contact one of our dedicated sales representatives to change the subscription level on the account.
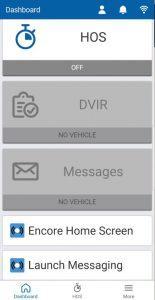
My Modules is the section of the application that contains all the application features available to you.
Customer data is stored on the portal for a rolling one-year period. However, extended storage is available for an additional cost.
Comet Suite FAQs
GPS stands for Global Positioning Systems. GPS is a network of satellites and receiving devices that compute locations on Earth, and it’s designed to provide precise positional data, velocity data, and global time synchronization for air, sea, and land travel.
MRM stands for Mobile Resource Management. This term refers to the coordination of your field personnel using wireless technology and devices.
LBS stands for Location-Based Services. It’s a way of explaining how wireless technology can integrate with GPS, providing multiple ways for you to manage your mobile resources.
These three solutions are separated by tiers, and are all designed to offer your business a different level of functionality.
Comet EZ is entirely web-based, and gives you the basic essentials of digital workforce management. It’s the most budget-friendly solution in our MRM applications suite.
Comet Tracker is more robust, with a host of additional features. It is client-based, but also gives you access to the web, so you can access your basic data from any computer that has internet access. Because Comet Tracker also lives behind your firewall, you can store and gather necessary information in a secure fashion.
Comet Mobile Worker offers a comprehensive suite of tools for your remote employees to use. Through included features like Wireless Forms, dispersed staff can transmit data recorded in the field back to your home office, and communicate with efficiency.
Actsoft solutions track in near real-time. As with all near real-time GPS tracking, there’s a slight lag time in transmission between the initial request for information and its eventual submission back to you. Our software allows you to ping your devices as frequently as once every 30 seconds.
Actsoft offers handset, vehicle-mounted, and battery-powered asset tracking solutions. Additionally, for low-cost, vehicle-based solutions, we have phone mounting kits that can secure your mobile devices to your fleet cars. Email us for more details at sales@actsoft.com.
Actsoft solutions have the ability to integrate with a variety of different payroll and software systems. Features of our products like Mobile Timekeeping, Job Order Dispatching, and Wireless Forms will help streamline your entire operation, and can all actively work with many existing solutions. For more information, feel free to reach out to our dedicated integration team at imex@actsoft.com.
With web-based access, there is no software to install and you can easily access programs from any computer with internet capability. In a client-based environment, we provide you with software that lives behind your firewall, giving you more control and security regarding your business’s information.
For questions related to pricing or to get a free quote, email us at sales@actsoft.com.
We have plenty of solutions available that do not require additional equipment purchases. However, certain specialized features may require additional equipment such as barcode scanners and vehicle engine monitors for maximum functionality.
As the application that’s installed on the mobile devices of your employees, mComet interacts with Actsoft’s Comet Suite products, which are easily accessible from a desktop computer.


 Actsoft partnered with Odin to provide our solutions overseas, through payment processing integrations. Odin helps us support user management for our software; customers can also purchase our products through Odin’s billing platform.
 VisTracks powers our Electronic Logging Device (ELD) solution, which enables transportation businesses to easily automate their hours of service logs, remain in governmental compliance, and reduce their potential to incur costly fines.
 Integration between Actsoft solutions and BeWhere’s software products is available. Take your team’s asset tracking, cellular data connectivity, and field insight a step further with effective, cross-application compatibility.
 CalAmp tracking devices for vehicles and assets alike are compatible with Actsoft solutions, making it easy for you to efficiently monitor your equipment and fleet cars. Help your team enhance accountability, safety, and savings through a combination of easily installed hardware and intuitive software.
 Gain even greater insight into the daily activities of your fleet using the combination of Geotab and Actsoft. Geotab devices provide detailed data collection and seamless integration with our solutions; learn more about the ways your vehicles are being used daily with the power of this tandem.
 Our partnership with Uniden is ideal for companies looking to gain advanced diagnostics on their fleets. Uniden’s extensive product listing of car electronics like radios, dash cams, radar detectors, and in-vehicle communicators work in concert with Actsoft’s solutions to better connect your vehicles to the company headquarters.
 Kyocera offers a wide range of mobile devices, ranging in design from traditional phones to ultra-durable handset technology. Actsoft is able to equip organizations in a variety of different industries with solutions for improved business, while Kyocera supplies the technology they can flawlessly operate on.
 Motorola’s mobile technology works in tandem with our solutions to provide extra versatility to your business practices. Coupled with our software’s features, Motorola’s reliable devices make connecting your workforce simpler than ever to do.
 Actsoft and Sanyo teamed up to merge intuitive business management software with the technology of today. This partnership allows us to provide you with all the tools your team needs for improved workflows, better coordination, and optimized productivity.
 We’re able to bundle certain solutions of ours (including our Electronic Visit Verification options) with Samsung devices to help your team achieve as much functionality as possible, while keeping rates affordable. Use these combinations for accurate recordkeeping, improved communication, and smarter data collection in the field.
 Our software is the perfect complement to Apple’s user-friendly technology. Equip your workforce with the devices and solutions it needs for optimized productivity during daily operations with Apple and Actsoft.