
New Features Sharpen TeamWherx® More Than Before
PANIC EVENT
Many employers are looking for new tools to keep their people safe, especially those working alone in the field or in other at-risk environments. The new Panic Event provides an easy way for field workers to notify the home office of an emergency situation.
Benefits
- One or more recipients can be alerted as soon as the worker activates the panic event.
- The alert activation on the handset can be discreet to better protect the worker.
- Staff in the office using the web application will receive a visual notification of the alert and who triggered it.
Use Cases
- An American hospital saw the rate of assaults on employees triple between 2019 and 2020 and decided to equip employees with the app, allowing them to notify security and share their location when they feel threatened. The new system has decreased the rate of attacks and improved the response time to those in need.
- A school district implemented panic button apps to give their teachers, faculty, and students the ability to discreetly call for help should the campus experience an emergency like an active shooter or assault.

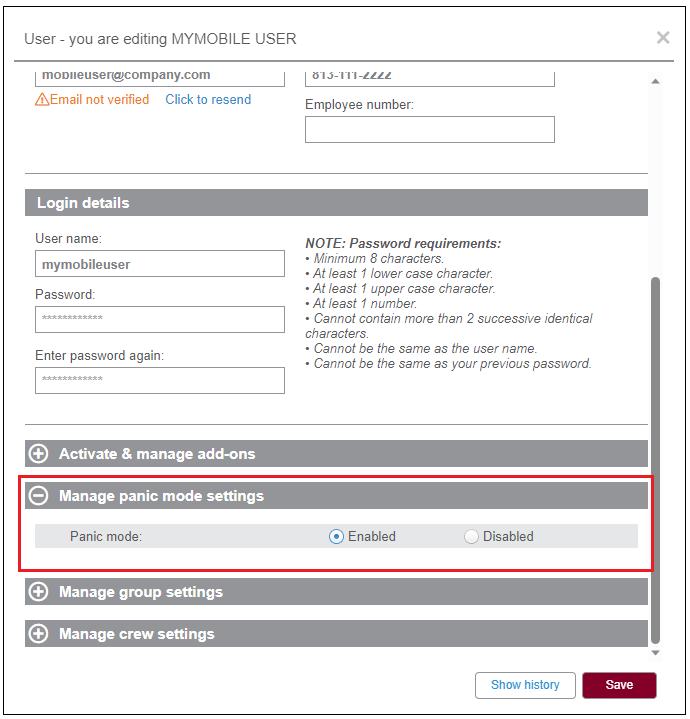
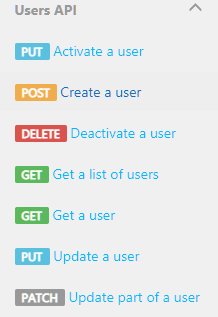
Configuring panic mode for a single user:
Manage panic mode settings have been added as a new section in the user configuration screen, allowing administrators to enable the Panic Mode functionality for a user.
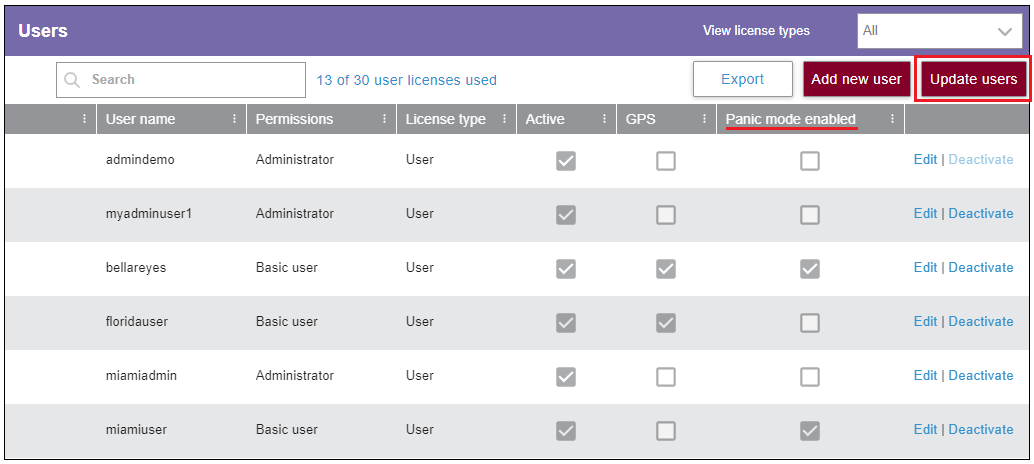
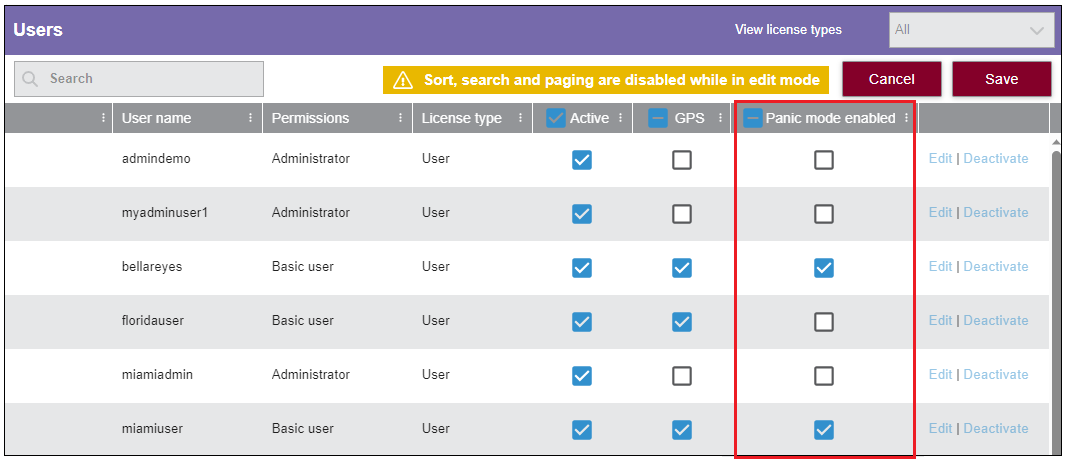
Configuring panic mode in bulk
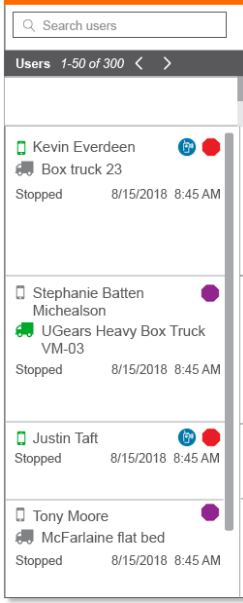
A new column named Panic mode enabled has been incorporated into the Users grid. Its purpose is to indicate if users have the panic feature enabled or not:
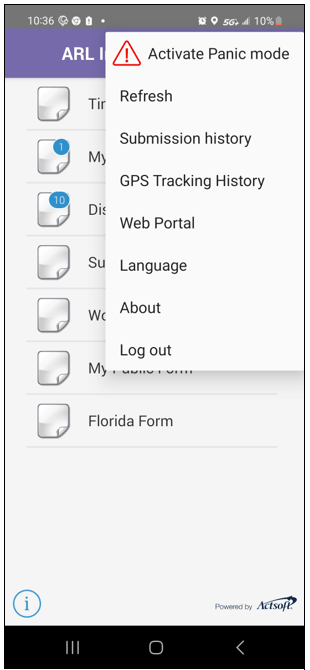
Activating the panic event in the mobile application
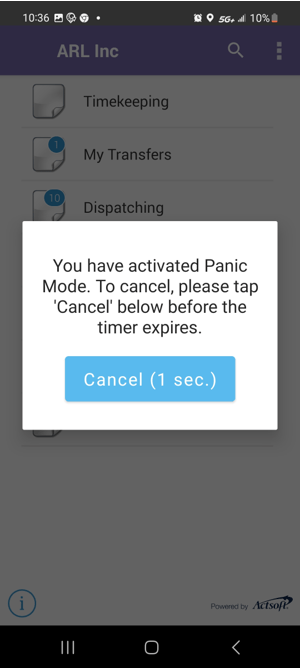
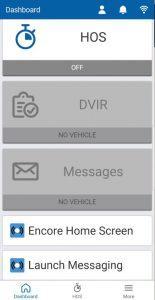
Once Panic Mode is enabled for a user, the mobile application receives an update to display the panic activation as the first option on the main screen’s menu. From that moment, the mobile application is equipped to submit the panic event as soon as the user taps on Activate Panic Mode.
After Panic Mode is activated, the app presents a 5-second timer to allow the user to cancel in case panic mode was activated accidentally. Next, a brief dialog indicating Collecting GPS Location and Submitting event will inform the user of the status of the transmission.
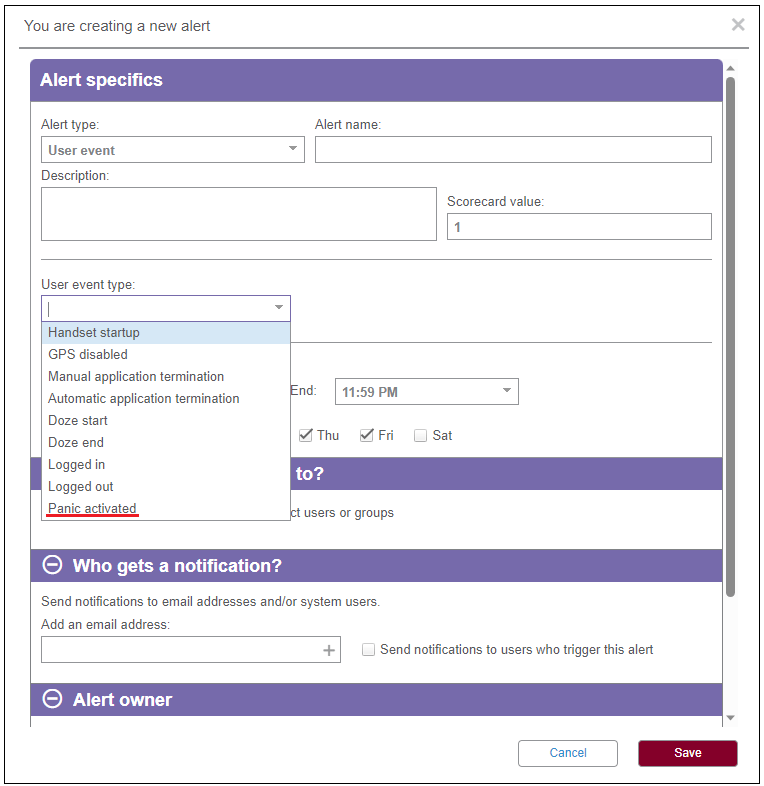
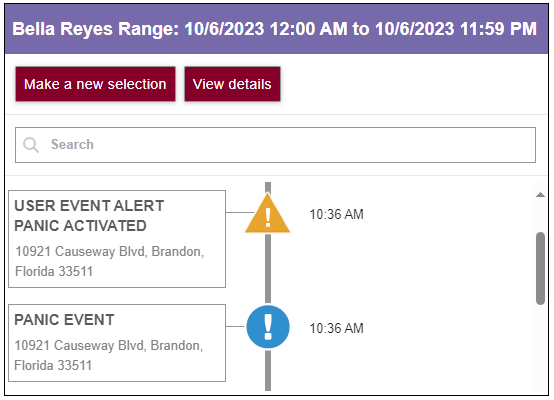
Panic alert emails are a quick and effective way to communicate panic situations to multiple employees, including a security team. The user event alert screen has been modified to include the Panic activated event:
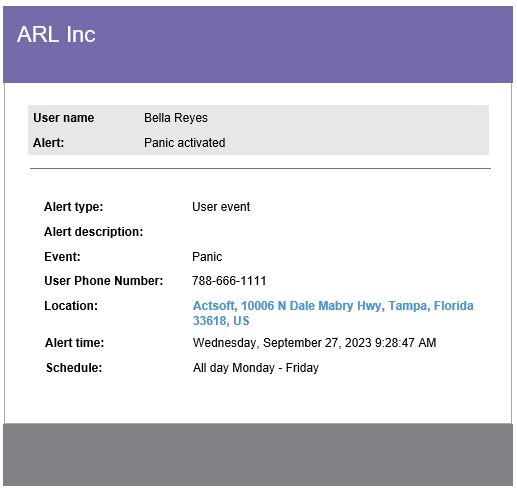
Panic alert email
The panic alert email includes the location where the alert occurred, the user name and the phone number defined in the system, so they can be easily located and contacted:
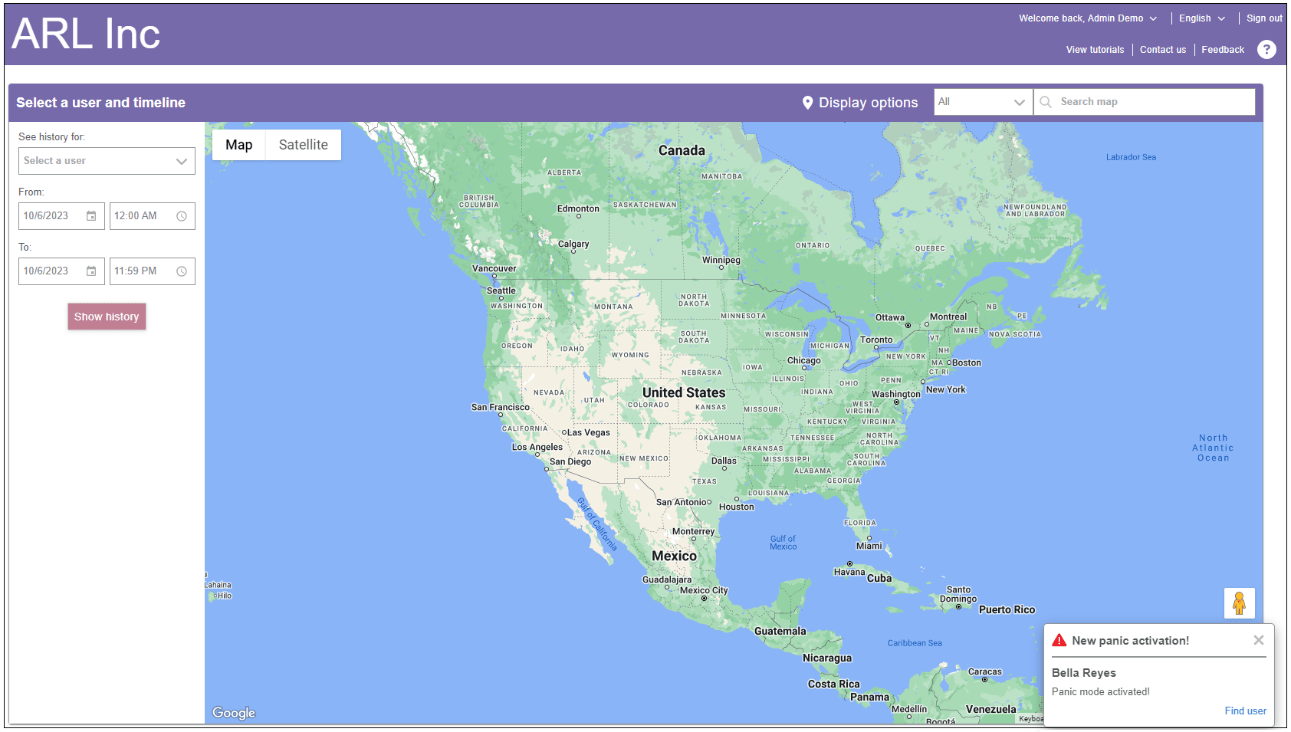
Visual notification in the web application
As an extra layer of warning, a visual notification is presented at the bottom-right corner of the screen of every web user who has permission to view the user in question, regardless of the page the user is on.
This notification will be displayed on the screen until dismissed. In the event of multiple alerts, they will display one above the other with the most recent at the top.

- The notification is only visible to web users who have access to view the user who triggered the panic event.
- When Location is off, the app will try to get GPS coordinates for some time before an event with no address is sent.
- Creating GPS disabled alerts for users with Panic activated can help supervisors to minimize the existence of Panic alerts without an address.
- Keeping users' phone numbers updated in the system is essential to easily reach users during risk situations.
USER DEFAULT STARTING PAGE
Use Cases
- The dispatcher of a Construction company communicated how convenient it would be to make the Live view screen the default login screen, as opposed to the Overview screen. They feel it unnecessary to have to click twice to reach the page.
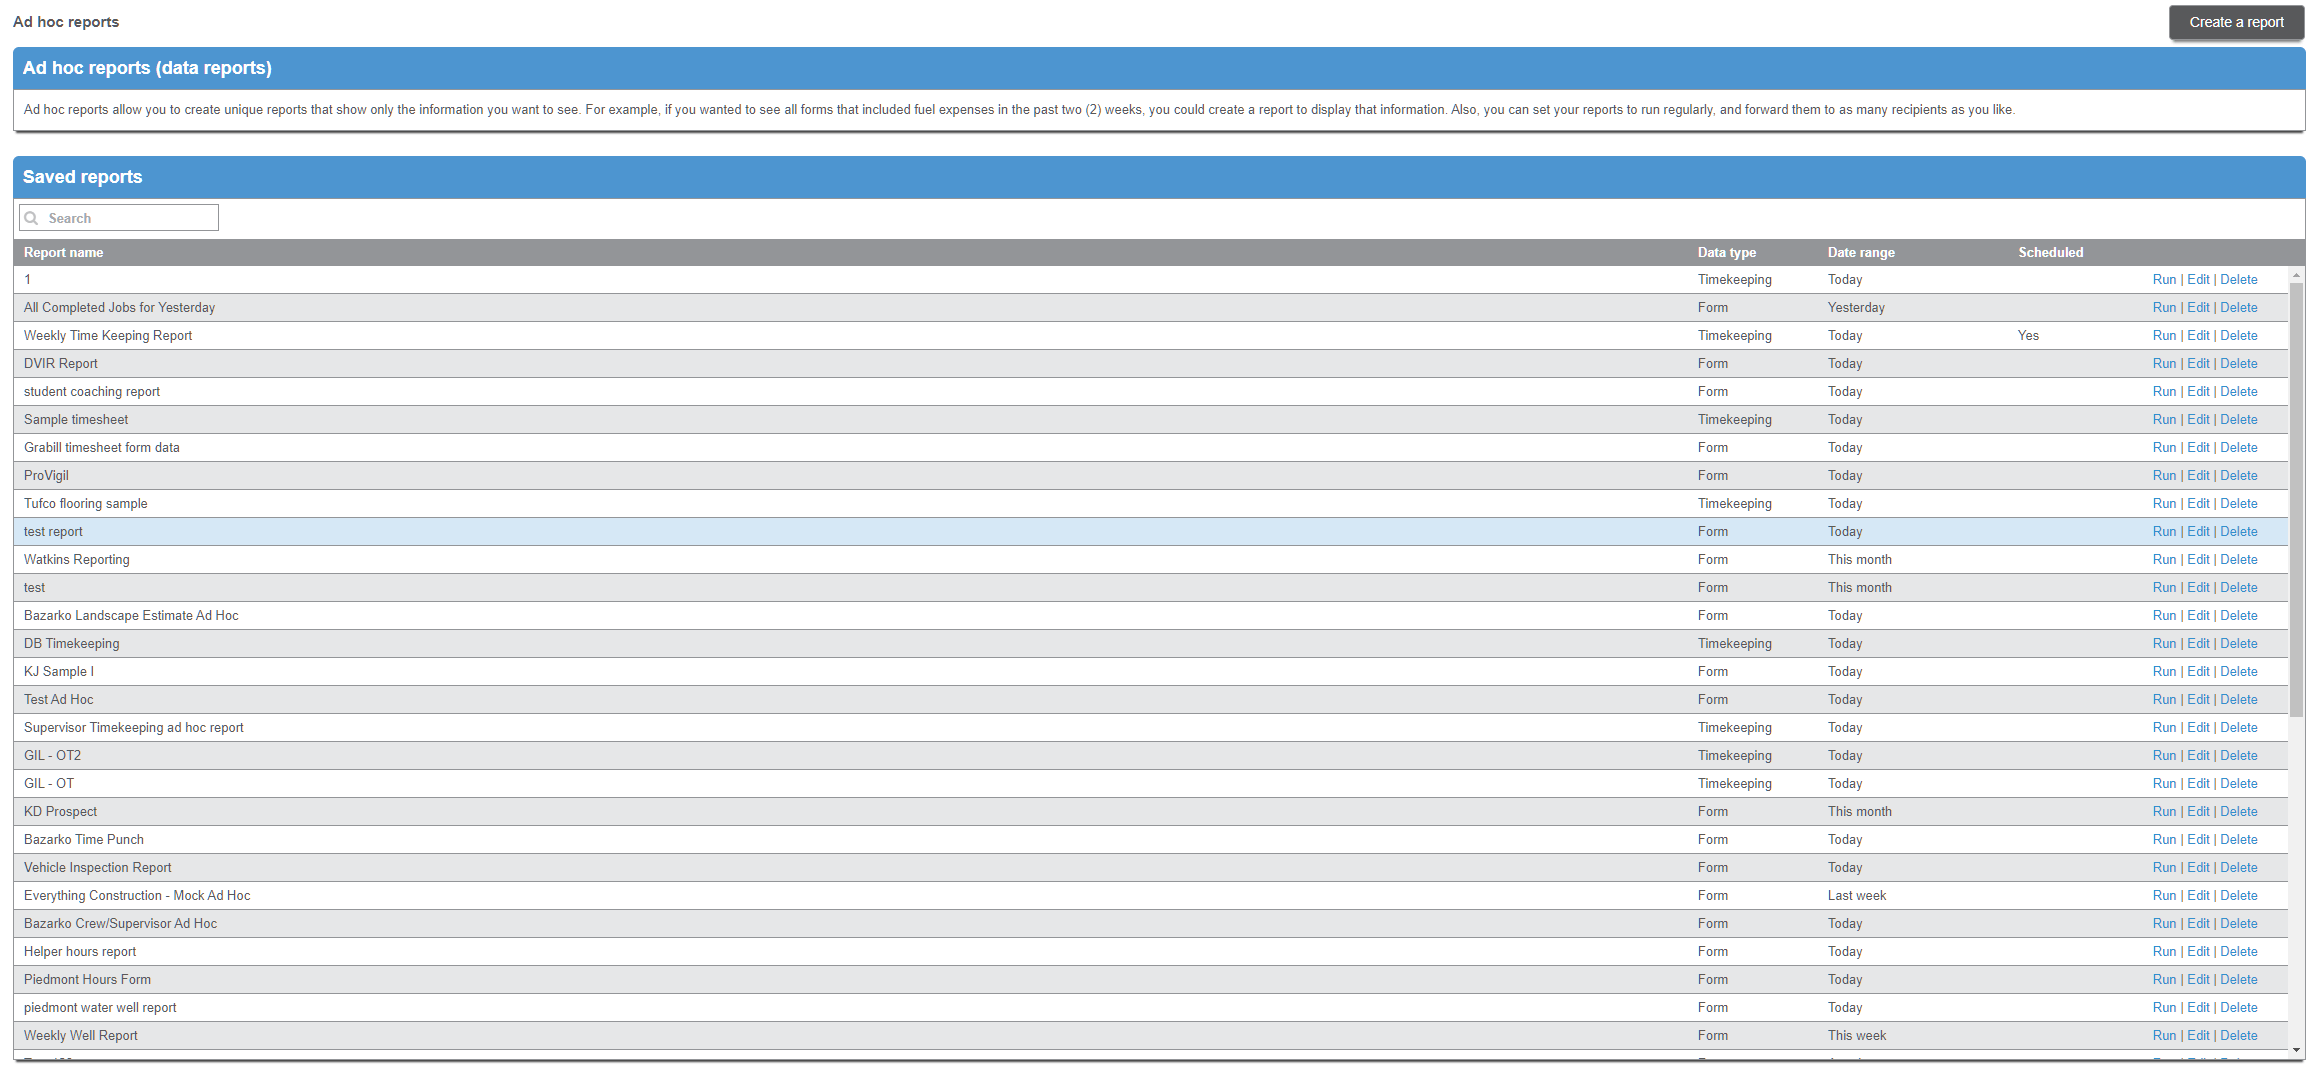
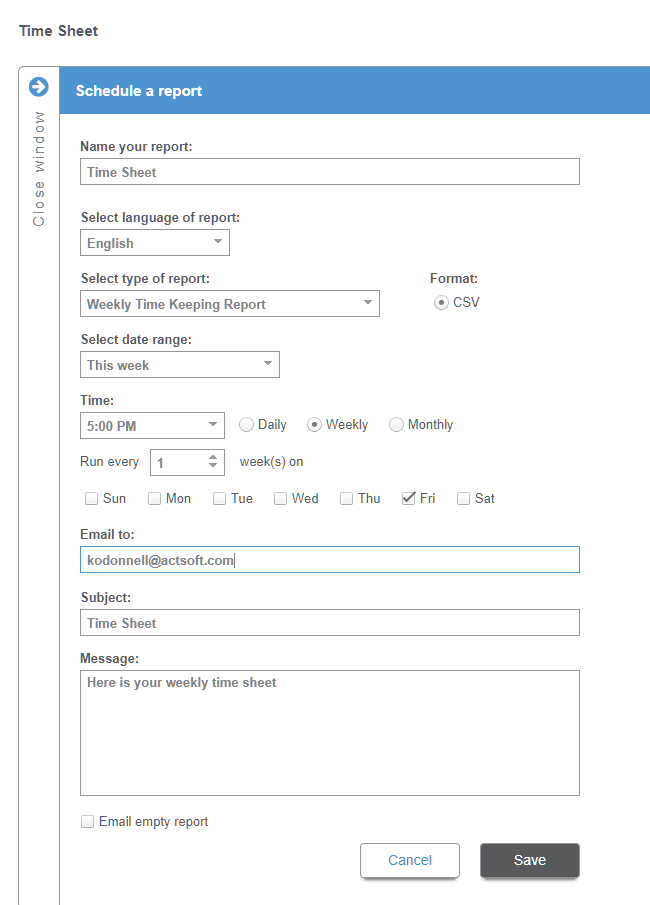
- A payroll specialist from ABC Inc. spends most of their time running Timekeeping reports after they log into the system. Now, they can set Administrative>Ad hoc reports as the starting page in their profile to quickly reach the information they need.
Video
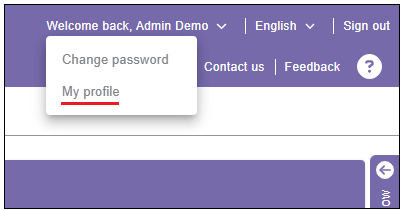
- Users will be redirected to the selected starting page when opening the site root at any moment (for example, by clicking on the platform logo).
- If a web user bookmarks a page from our app, the browser may use the bookmark after logging in instead of the default page.
- If a customer sets a default page that they no longer have access to due to security permission changes, module deletion, etc., the 403 Permission Denied page will be displayed. Clicking continue should redirect them to the Overview/Live view page.
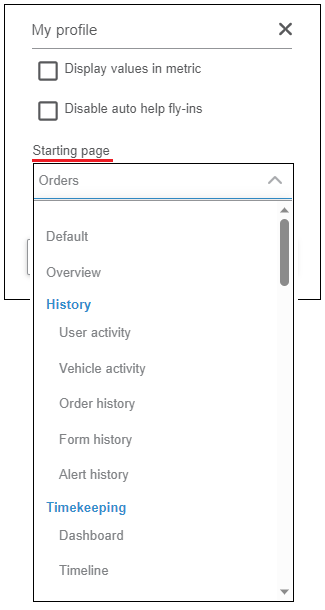
Pages available per user role:
Admin users
Default - This will ignore the Starting Page and use the existing system default functionality
Overview
History>User activity
History>Vehicle activity
History>Order history
History>Form history
History>Alert history
Timekeeping>Dashboard
Timekeeping>Timeline
Timekeeping>Entries
Timekeeping>Reports
Tracking>Dashboard
Tracking>Live view
Tracking>Geofences
Tracking>Alerts
Tracking>User reports
Tracking>Fleet reports
Wireless Forms>My forms
Wireless Forms>Form name A
Wireless Forms>Form name B
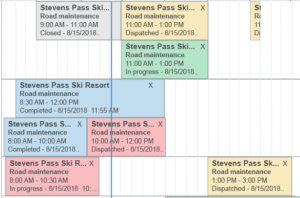
Dispatching>Dashboard
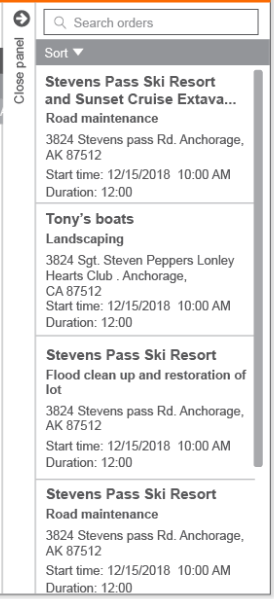
Dispatching>Orders
Dispatching>Scheduler
Dispatching>Recurring orders
Dispatching>Clients
Dispatching>Reports
Messaging
Administrative>Settings
Administrative>Users
Administrative>Groups
Administrative>Vehicles
Administrative>Modules
Administrative>File Import
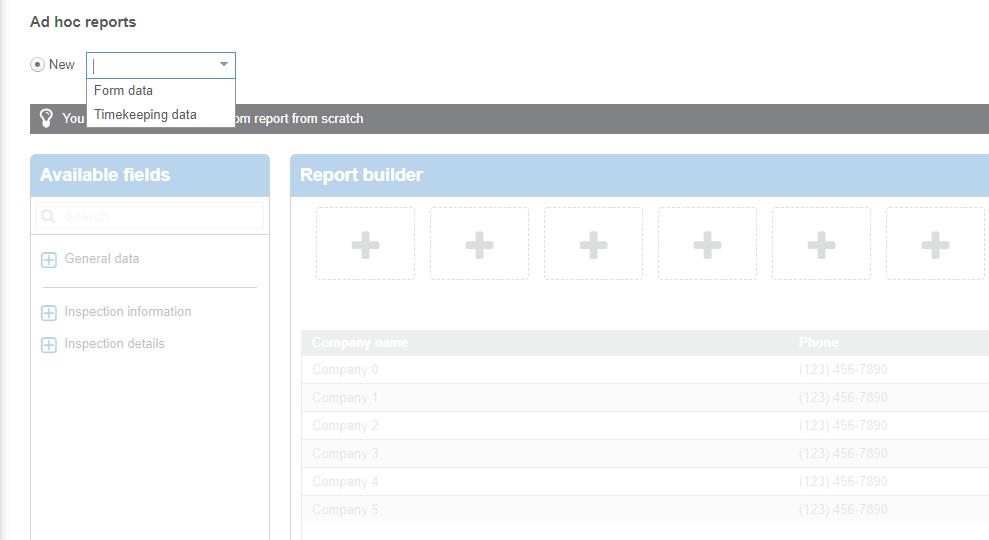
Administrative>Ad hoc reports
Administrative>Custom lists
Power Users:
Same as Admin except:
Administrative>Settings
Administrative>Users
Administrative>Groups
Administrative>Vehicles
Administrative>File Import
Basic Users:
Same as Admin except:
Administrative>Settings
Administrative>Users
Administrative>Groups
Administrative>Vehicles
Administrative>Custom lists
Administrative>File Import
ENHANCEMENTS
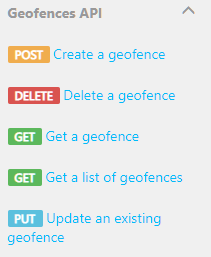
GEOFENCES GRID UPGRADE
Geofences designate specific geographical boundaries on a map, serving various purposes such as defining areas of significance like homes, offices, or zones with restricted employee entry or exit. The Geofences section of our application has undergone a significant upgrade. It now features the latest grid components and a redesigned, modern, and highly functional user interface, packed with valuable features and functionalities.
Benefits
- The new grid presents more relevant information at a glance.
- Users can export a list of geofences to a .CSV file, including separate address elements as columns.
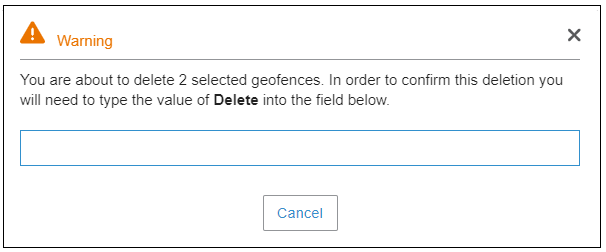
- It’s now possible to delete multiple geofences in bulk.
- Sorting and grouping by columns is now available.
Use Cases
- A Logistics company using geofences extensively needed a way to export a list of all the geofences, make changes to the file, and upload the updated list. They can now export the list of geofences including every element of the address separated by column.
- Environment Inc. imported over four thousand geofences to the platform using file import, but then noticed duplicates were triggering unnecessary events. With the new grid they can delete items in bulk, rather than taking an enormous amount of time to delete duplicates because you must delete them individually.
The Geofences screen
The new grid comes with all the advantages of the upgraded components, such as sorting ascending or descending, grouping by column, and paging.
Extracting a list of all geofences listed in the grid is possible through the Export button:
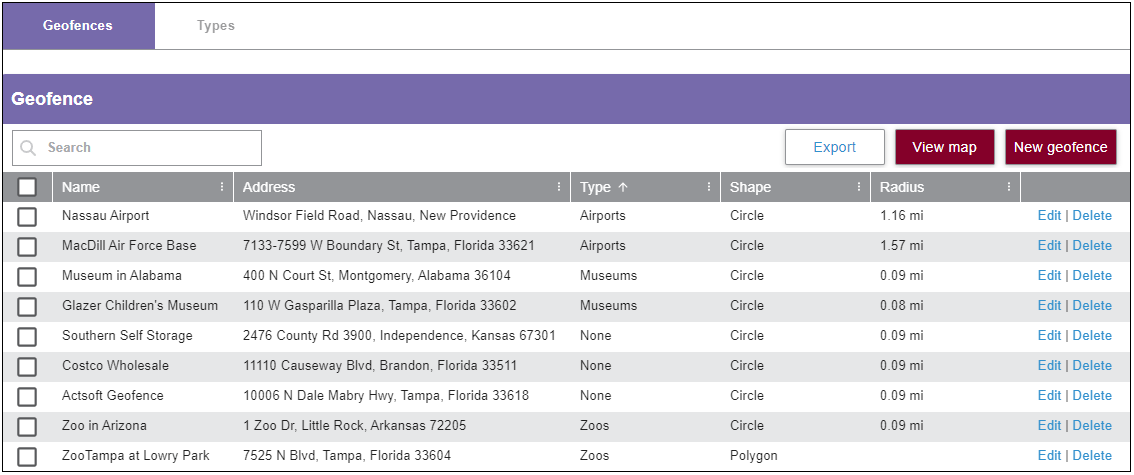
View/Close map allows you to open or close the map section located on the right side:

The Types screen
The Geofence Types screen maintains a similar layout, featuring a list of types on the left side and the geofences assigned to that type on the right. However, with the enhancements each geofence type has its own Edit and Delete buttons, and users can utilize the checkboxes for effortless dragging and dropping to the left panel. We have also added a color picker to easily distinguish each type on the map:

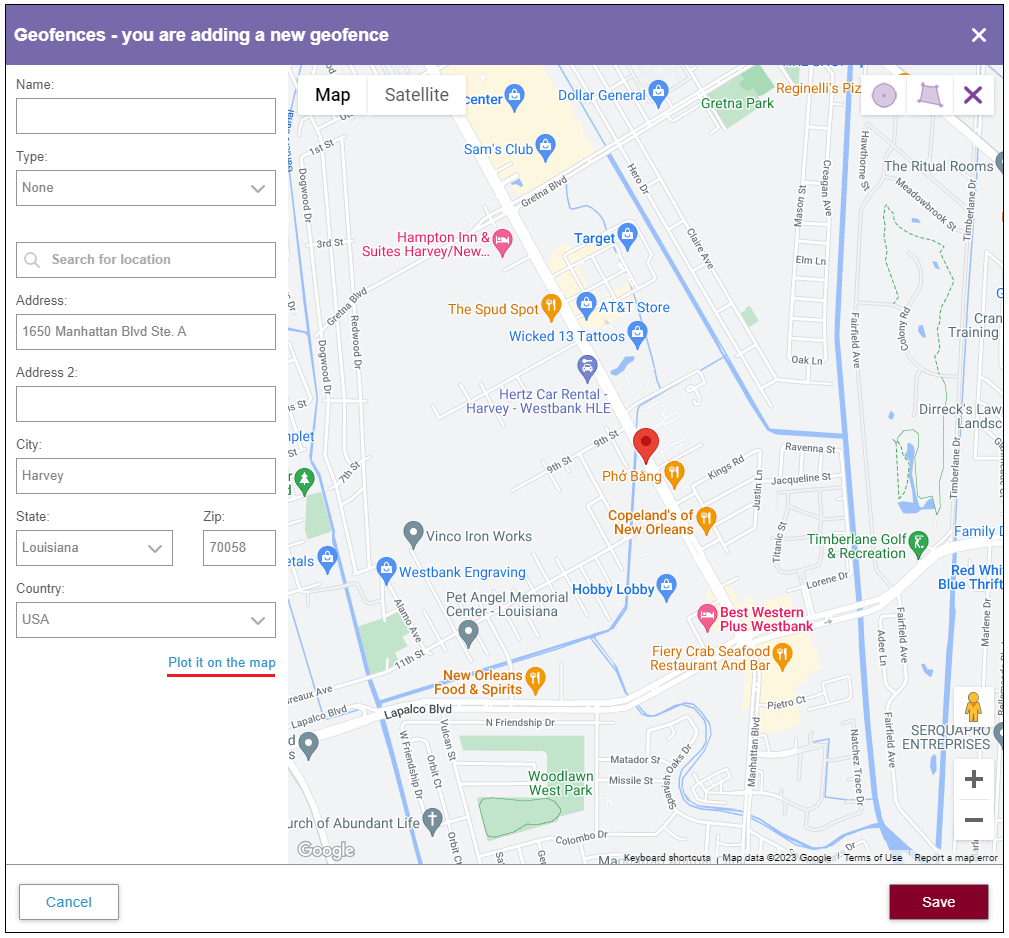
The new geofence creation screen has been equipped with a Search for location box with autocomplete incorporated. When users start typing an address, the search engine will return place predictions in the form of a dropdown list so the user can select the correct address. The selected address will be plotted and centered on the map.
Alternatively, users can fill out each field part of the address and click on Plot it on the map. If a matching address is found, it will be populated and centered on the map.
Users can still select and draw a geofence shape directly on the map without having to enter an address:
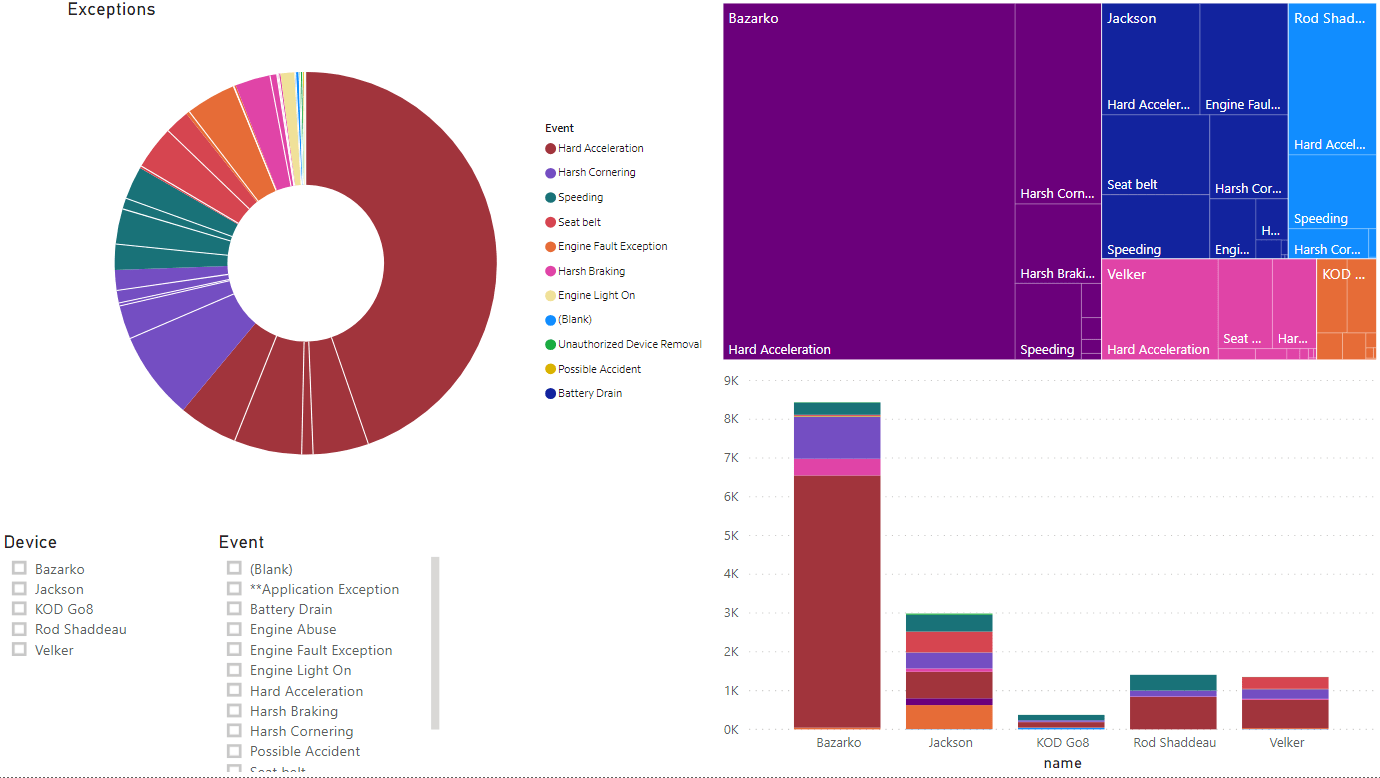
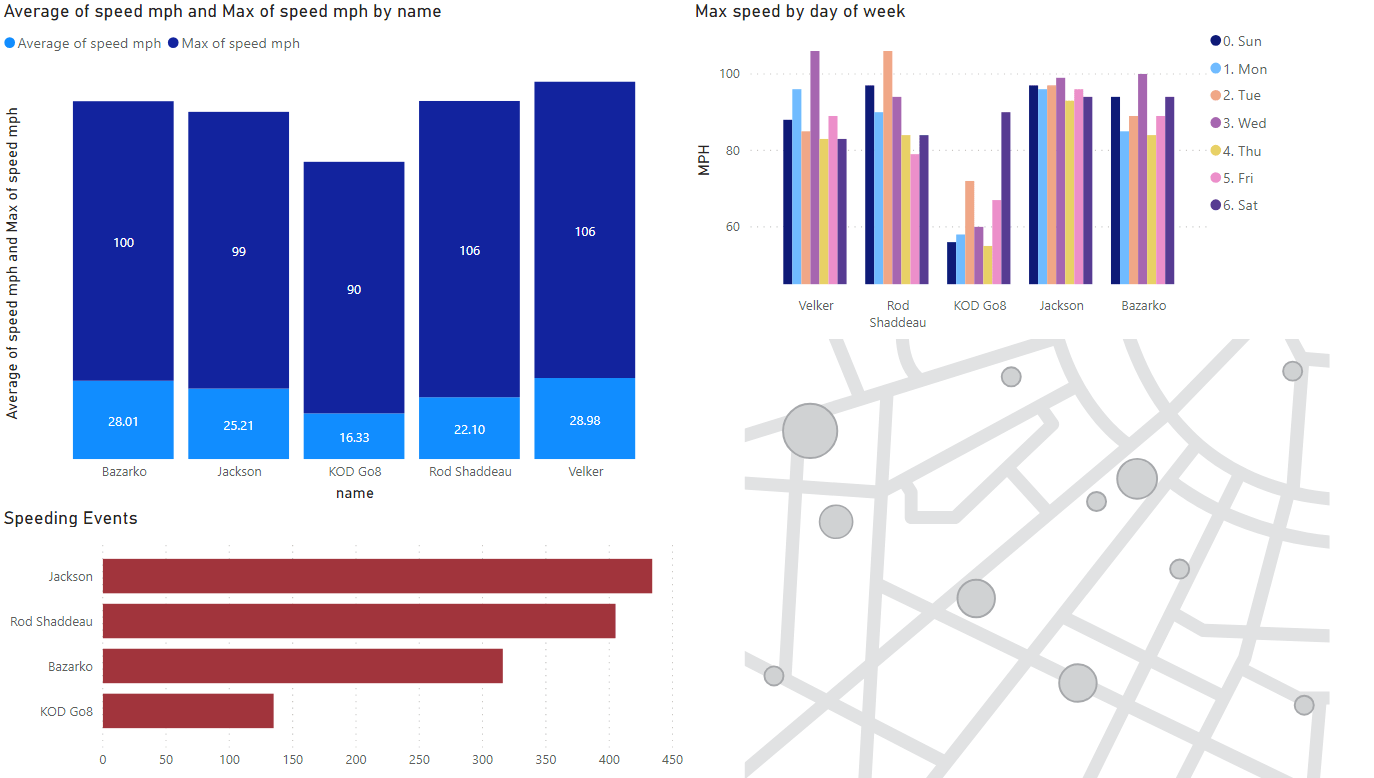
DISPLAYING CUSTOM PARAMETERS FOR EXTERNAL EVENTS
Use Case
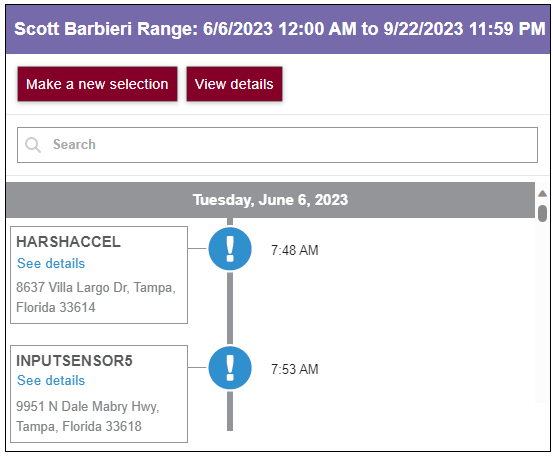
A customer using a dashcam system has set up different events to be pushed to the platform through the API portal. At present, they can only see the event name, but from now on they have the ability to set up parameters for the event and display them in different parts of the application.
TrainingThe custom parameters are displayed in User Activity, Vehicle Activity, Alert History, and Alerts.
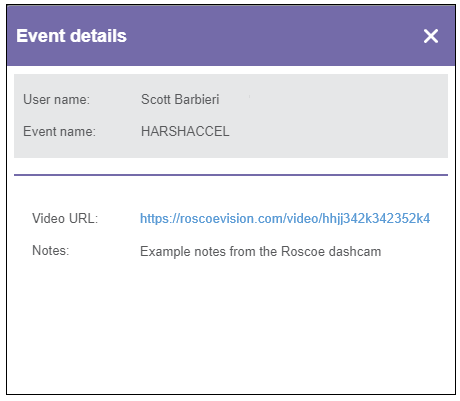
Displaying custom parameters in History
Displaying custom parameters in Alerts
Our application supports creating alerts for external events. We are also presenting the custom parameters in the Alert history drawer:
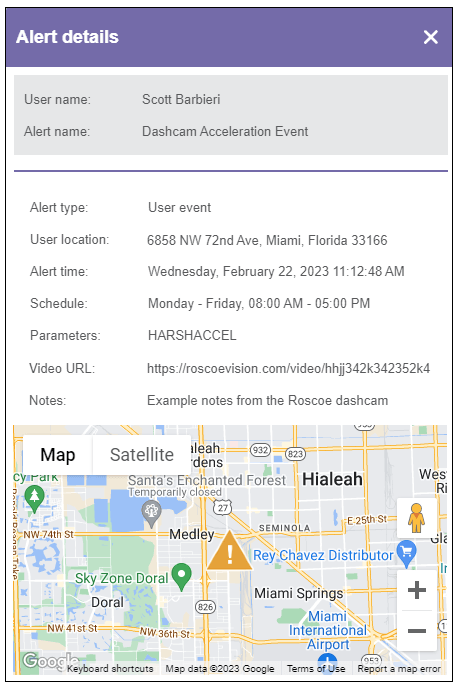
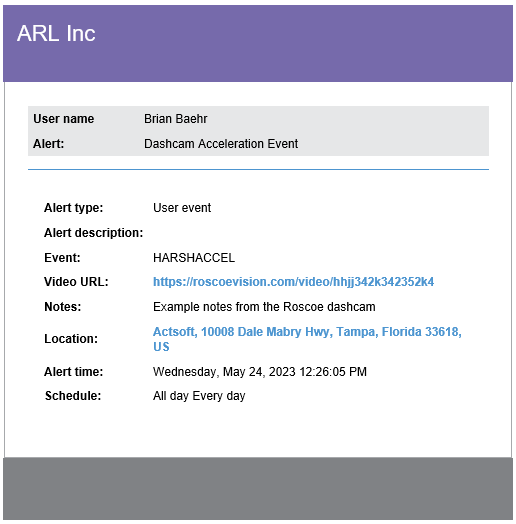
Displaying custom parameters in the Alert email:
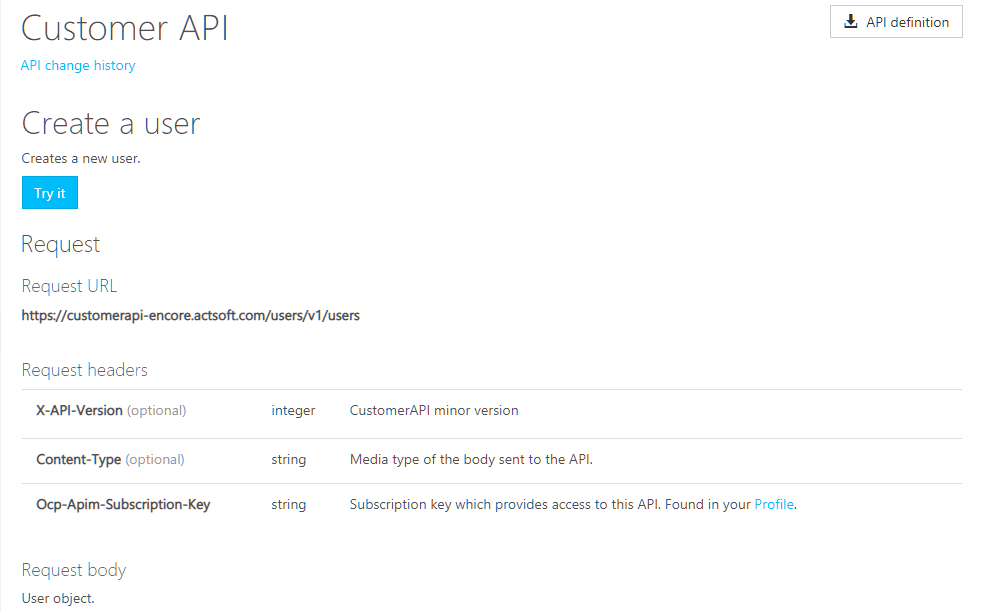
CUSTOMER API LOGIN WITH USER CREDENTIALS
Benefits
- The feature will benefit our internal users who work with different accounts because they won’t need separate credentials to log in to the API portal.
- Customers can create a user account for their developer to allow them access to the web portal for testing purposes and have direct access to the API portal with the same credentials.
A few changes have been made to the API setup screen in Administrative>Settings. As you can see below, the upper text in API information has been simplified. The API credentials area will display information depending on the Access type configured on the account:
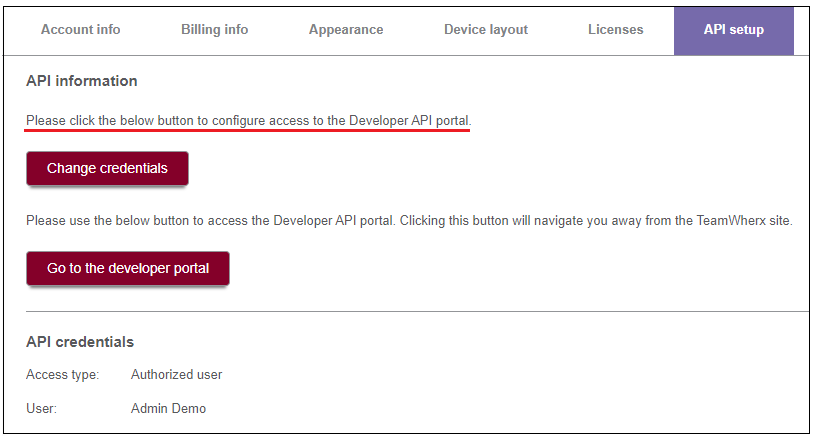
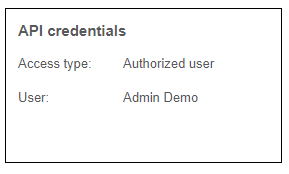
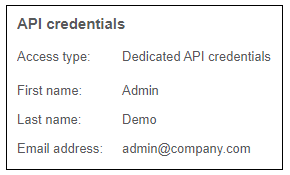
Access type Authorized user Access type Dedicated API credentials
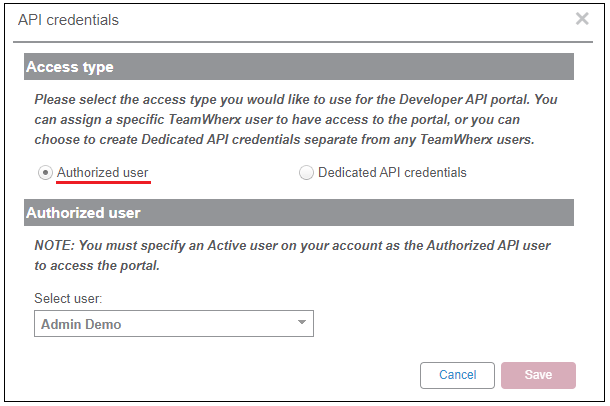
Selecting Change credentials will present the API credentials screen with the two access types to choose from.
The Authorized user option allows you to select an existing account user from the dropdown. This will give them permission to log in to the API portal with the same authentication credentials they use to log in to our application. The credentials can be their username and password or Single Sign-On.
Once the user selects Go to the developer portal, a modified API portal authentication page containing the two access options is presented:
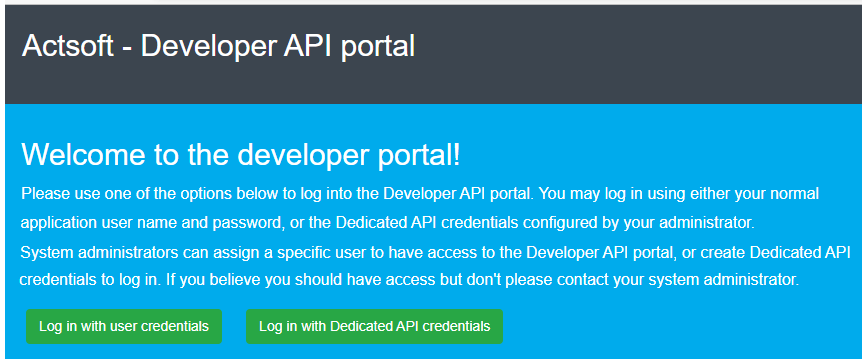
Log in with user credentials will grant access to the portal with the same credentials the user is currently logged to our application.
Log in with dedicated API credentials will present the current login interface, where the user enters the API username and password.
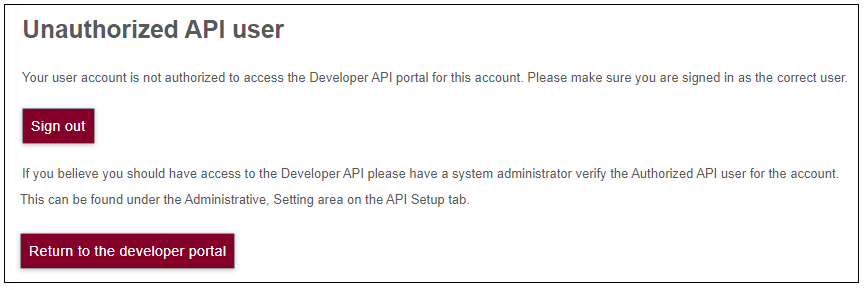
The following message is displayed when a user tries to log in with their authenticated user credentials but is not defined as the Authorized user:
Notes:
- Only one set of credentials can be defined per account.
- Only Active users can be designated as Authorized API users.
- Authorized users cannot be deleted from the system without previously removing their authorization. In this case, a warning will be presented.
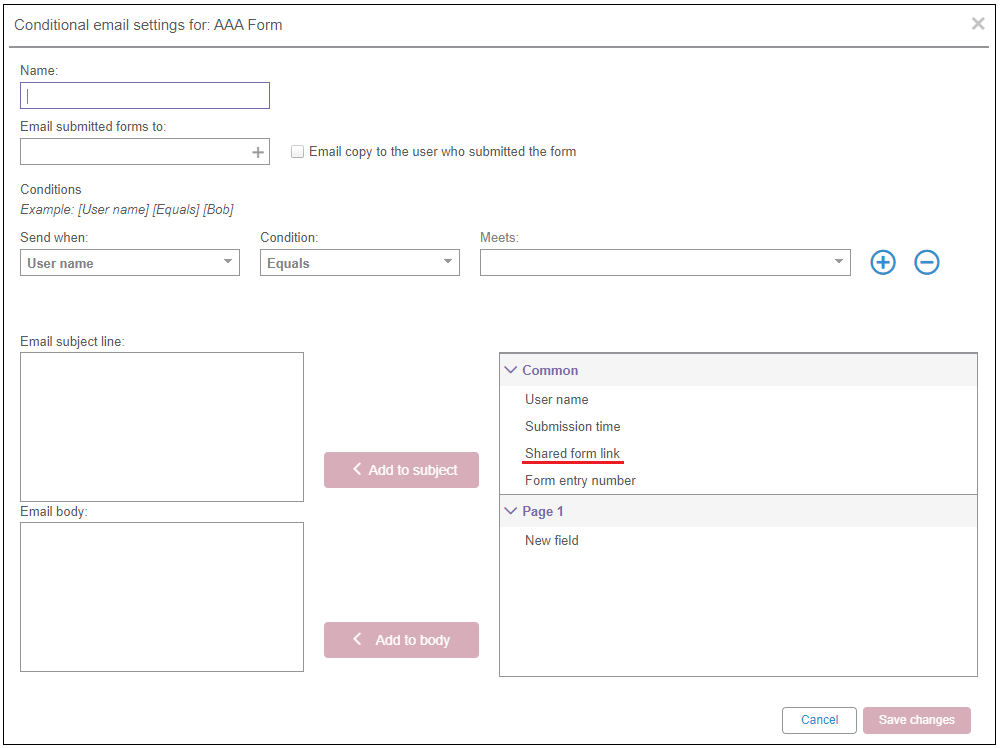
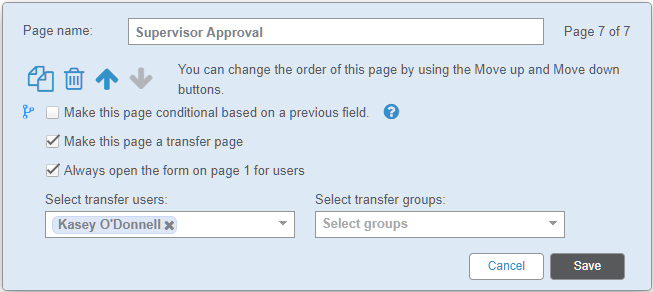
SHARED FORM LINK IN CONDITIONAL EMAILS
Conditional emails in a form module can send a copy of the submitted form when certain criteria are met. The Shared form link is now available as a common field in Email settings.
Use case
An Auto Club is using our wireless forms and has added the Shared form link so that emailed users can have access to any attachments uploaded to the form. The problem they are facing is that some of their forms have conditional emails, and the Shared link was not an available field to be added to the body of the email. This is now possible with the new update.
Training


 Actsoft partnered with Odin to provide our solutions overseas, through payment processing integrations. Odin helps us support user management for our software; customers can also purchase our products through Odin’s billing platform.

 VisTracks powers our Electronic Logging Device (ELD) solution, which enables transportation businesses to easily automate their hours of service logs, remain in governmental compliance, and reduce their potential to incur costly fines.
 Integration between Actsoft solutions and BeWhere’s software products is available. Take your team’s asset tracking, cellular data connectivity, and field insight a step further with effective, cross-application compatibility.
 CalAmp tracking devices for vehicles and assets alike are compatible with Actsoft solutions, making it easy for you to efficiently monitor your equipment and fleet cars. Help your team enhance accountability, safety, and savings through a combination of easily installed hardware and intuitive software.
 Gain even greater insight into the daily activities of your fleet using the combination of Geotab and Actsoft. Geotab devices provide detailed data collection and seamless integration with our solutions; learn more about the ways your vehicles are being used daily with the power of this tandem.
 Our partnership with Uniden is ideal for companies looking to gain advanced diagnostics on their fleets. Uniden’s extensive product listing of car electronics like radios, dash cams, radar detectors, and in-vehicle communicators work in concert with Actsoft’s solutions to better connect your vehicles to the company headquarters.
 Kyocera offers a wide range of mobile devices, ranging in design from traditional phones to ultra-durable handset technology. Actsoft is able to equip organizations in a variety of different industries with solutions for improved business, while Kyocera supplies the technology they can flawlessly operate on.

 Motorola’s mobile technology works in tandem with our solutions to provide extra versatility to your business practices. Coupled with our software’s features, Motorola’s reliable devices make connecting your workforce simpler than ever to do.
 Actsoft and Sanyo teamed up to merge intuitive business management software with the technology of today. This partnership allows us to provide you with all the tools your team needs for improved workflows, better coordination, and optimized productivity.
 We’re able to bundle certain solutions of ours (including our Electronic Visit Verification options) with Samsung devices to help your team achieve as much functionality as possible, while keeping rates affordable. Use these combinations for accurate recordkeeping, improved communication, and smarter data collection in the field.
 Our software is the perfect complement to Apple’s user-friendly technology. Equip your workforce with the devices and solutions it needs for optimized productivity during daily operations with Apple and Actsoft.